

Recording has been always challenging and fun, as throughout the years, I was involved in different types of projects from multi-track recordings to video trailers and actual films.
A multi-track recording usually engages capturing Bassline, Drums, Percussions and other live instruments, as well as Vocal (maybe), whereas a film, or video trailer (which usually has a soundtrack that is actually a multi-track recording that was just described) also consists in recording a variety of other things, depending on the video content. That would be Dialogue, Sound Effects (e.g. explosions, car chases, gun shoots), Backgrounds (e.g. birds if we are in a park, sirens and horns if we are in a city) and Foley (anything from the swishing of clothing and footsteps to squeaky doors and breaking glass). They all have to be carefully chosen so as to help telling the story.
Check Leslie Bloome’s interview, which is a very respected Foley Artist:
Hoping that you are not confused yet and bearing in mind the above, we can imagine that the recording techniques used for a multi-track recording differ from the ones used for a film or game trailer, as different things are required.
In the next section, I will try to elaborate a few of my recordings to show you some of the techniques I usually approach (however, when it comes to recording, there are only guidelines, no rules, as you might look for a specific sound that maybe nobody has ever heard it before – this is where the fun begins since you have to come up with new ideas and experiment to achieve the sound you were looking for).
MULTI-TRACK RECORDING
DRUMS RECORDING

Figure 01
The first step prior to recording drums, was tuning the kit in order to get the right sound from it and avoid excessive ring, snare buzz, overtones and sympathetic resonance (Seymour, 2010).
A kick microphone was placed near the inside head for a fast attack while another near the outside head in order to achieve a full-bodied sound (Strong, 2014).
The Snare drum is an important key in house/dance music. Therefore, a dynamic microphone with acoustic properties similar to a condenser microphone was used, as suggested by Strong (2014). The Snare microphone’s pick-up pattern is super-cardioid, which poses a challenge in capturing the bleeding from the Hi-Hat and High Tom. However, despite this, the desired sound was produced although in other circumstances, it is safer to use a cardioid microphone. Using a Snare bottom microphone, added more presence to the overall snare sound, as the top one did not capture enough of the snap of the snare strainers below the drum (Owsinski, 2007).
The Hi-Hat microphone was pointed slightly further from the drum, to obtain a more natural sound and a longer high end (see Figure 1).
The overheads were captured with the XY approach, having the purpose of recording the overall sound of the drums and add weight.

Figure 02
The room microphones were placed closer to the floor, which is parquet and has earlier reflections, than the ceiling, which is acoustically treated (See Figure 02). A Hall microphone was used to create a natural delay effect and give the impression of a larger room.
BASSLINE RECORDING

Figure 03
Two dynamic microphones were used to record the Bass. One was placed on centre of the cone to achieve a brighter sound, while the other one was off centre to capture the low end. To obtain the crispness of the bass and the flexibility of manipulating the sound at a later stage, a SansAmp Bass Driver DI was used, as advised by Huber & Runstein (2013) (See figure 03).
ACOUSTIC GUITAR RECORDING
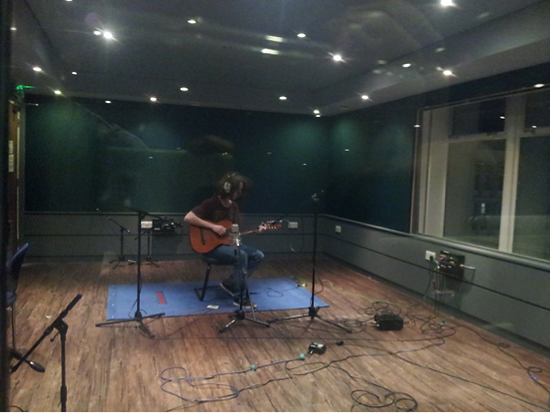
Figure 04
The Acoustic Guitar was recorded with a pair of small-diaphragm condensers along with the U47. To cover a larger amount of frequencies, one was positioned on the 12th Fret, the other one towards the sound hole, whereas the U47 was pointed at the edge of the hole (See Figure 04).
ELECTRIC GUITAR RECORDING

Figure 05
After experimenting combinations of the four microphones to record the Electric Guitar, only the E 609 and the KM184 were used in the end, as this posture fitted perfectly within the mix (See Figure 05). As some of the beats were not synchronized, Beat Detective was used within Pro Tools to fix this before continuing to the mixing stage.
TRUMPET RECORDING

Figure 06
The Trumpet was recorded in Toft studio. The Microphones were set up so as the trumpeter faced the corner in between the 2 windows of the studios (Toft and D-Command Stereo) while recording. This way, the reflections would be a little more balanced, as they will be equally reflected from the windows (See Figure 06).

Figure 07
The Neumann U87 was positioned too close to the bell of the horn, therefore the excess of tongue noise and air leaks were noticeable. Backing up the microphone solved the problem in this case.
The U87 was placed 2 feet away from the trumpet and was positioned above the bell aiming towards the mouthpiece.
The C414s were placed 4 feet away from the bell of the horn to capture more of the room (See Figure 07).
VIOLIN RECORDING
The Violin radiates sound omni-directionally but brilliance of tone comes from the top of the instrument. Therefore, the microphones were positioned in a way that could capture the tone, which comes from the top (See Figure 08).

Figure 08
VOCAL RECORDING
The Vocal was recorded with a U87 and a C12, both condenser microphones, to capture an overall sound of the singer (See Figure 09 and 10).
A filter reflection was used to avoid the reflections of the room. The signal was sent straight to the Tube-tech Compressor to add some analog warmth (See Figure 11).

Figure 09

Figure 10

Figure 11
Rap Recording
This story continues in the "Mixing" section.
RECORDING FOR PICTURE
In this section I will be explaining a little about a video animation I worked on with other professionals in the industry. It’s called “Alma” and you can watch it below:
!!! Please avoid multitasking (watching the video and reading below at the same time), as you might understand less from the story haha).
The first step in the pre-production stage was a team brainstorm to recognise the order that introduces the audience into Alma’s imaginary world.
As a result, the team identified the diegetic sounds that were further recorded and edited in the next phases using the Foley technique. The non-diegetic sounds were used to include specific words and phrases with an emotional meaning.
Research on simulating sounds was undertaken, such as creating footsteps in the snow using cornstalks and creating the wind by recording a specific whistle blowing.
The recording phase started with simulating the sounds that have a source within the story world and was done indoor, in the studio as well as outdoors. The latter was achieved using a Zoom H4n recorder and different condenser microphones.
There are three types of environments within the moving picture: the city, the shop and the puppet. The city was constructed as a cyclic ambient both in the beginning and end of the video, through the Christmas Market and the church bell.
To enhance the sound of the wind and make it more realistic, an Oscillator containing white noise was used. For the shop environment a room tone was recorded, whereas within the puppet there is no room tone as the purpose was to create a claustrophobic atmosphere using audio effects on Alma’s breaths at a later stage.
Multiple sound effects were used. The organic sounds were used to add to the authenticity of the video. Moreover, external sound effects added dramatic significance through expression of the character’s inner thoughts and help the audience to understand the meaning of the scene. A Theremin was used to create anticipation as well as fear when Alma is reaching towards the doll.
This would be all about the recording process for now. However, If you want to find out more about sound design, you can have a look at the “Sound Design” section, in the "Portfolio", where I created the sound for Star Craft II (not the original one, haha, but you can see my version, my approach and then compare it with the original…see what you think).